

Arduino Talkie Speech Amplifier Shield for ESP32
Give your robots a voice with the Speech Amplifier and the library Talkie. Squeeze the tiny Amplifier shield into any ESP32 small device.
New boards are now available in the shop again. In addition, the price during December is reduced by 5% to show my appreciation for all the patiently waiting customers.
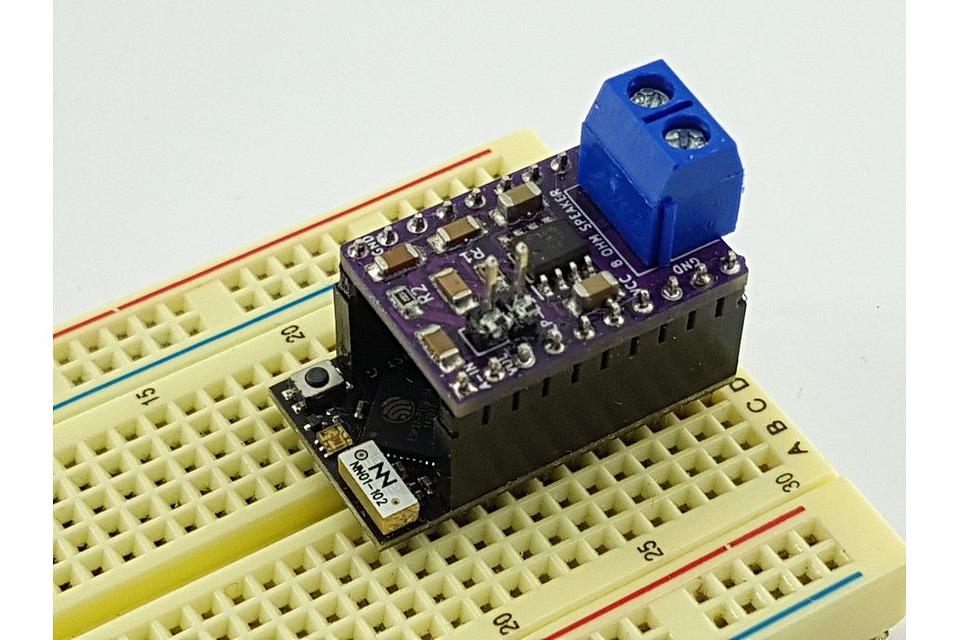
Description Mounting the Amplifier shield on top of the TinyPICO avoids all mess with cables. With ESP32 WiFi and over-the-air (OTA), there is a possibility to update the code (firmware) without disassembling the robot. The amplifier has a built-in voice filter to limit unnecessary high frequencies. Use the second DAC to control the Arduino Talkie Speech Amplifier's volume digitally.
Usage
Add the Amplifier shield board to the ESP82 TinyPICO so that the screw terminal is above the USB connector. Next, connect an 8-32 Ohm speaker element to the screw terminal.
- Connect power to the shield once it is confirmed correctly plugged in!
Please, see the Arduino library installation documentation and how to install the Arduino library.
Try one of the sketches in the example directory, for example, my hello.ino or goodmorning.ino. Then, use Over-The-Air (OTA) to update your ESP32 TinyPICO robot remotely. See the example updaterobotOTA for a start.
Other usages than robotics may be a customized keyboard pad with voice reply for entering a building, adding sounds to a game, which was original use in the 70s/or early 80s, or a keyboard trainer.
Features
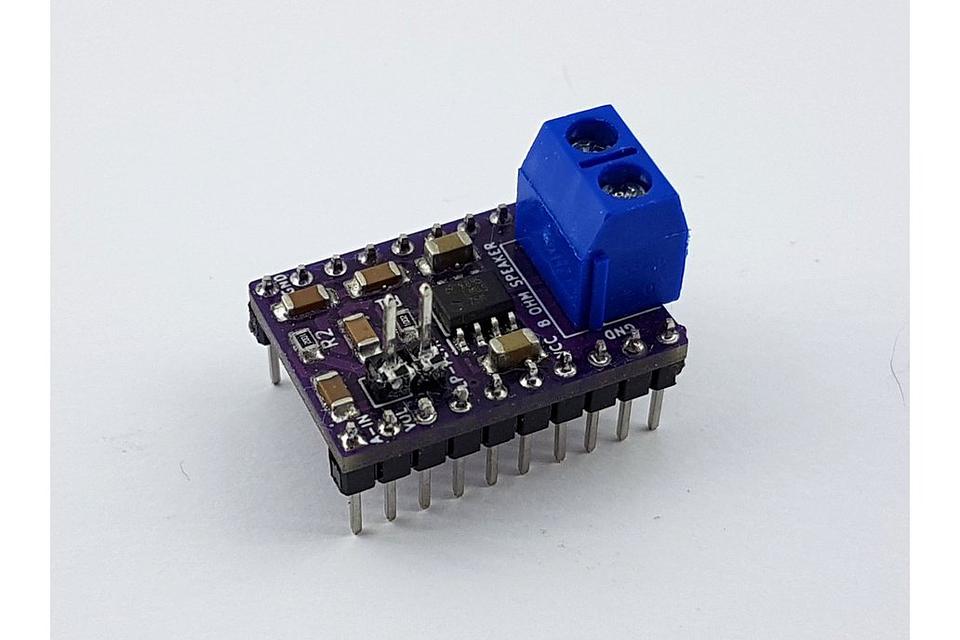
The Arduino Talkie Speech Amplifier uses Texas Instrument's LM4875 chip and amplifies the DAC signal from ESP32 TinyPICO GPIO25.
GPIO26 can be either connected to 3.3V for maximum gain/speaker volume or digitally controlled by the second DAC in the ESP32.
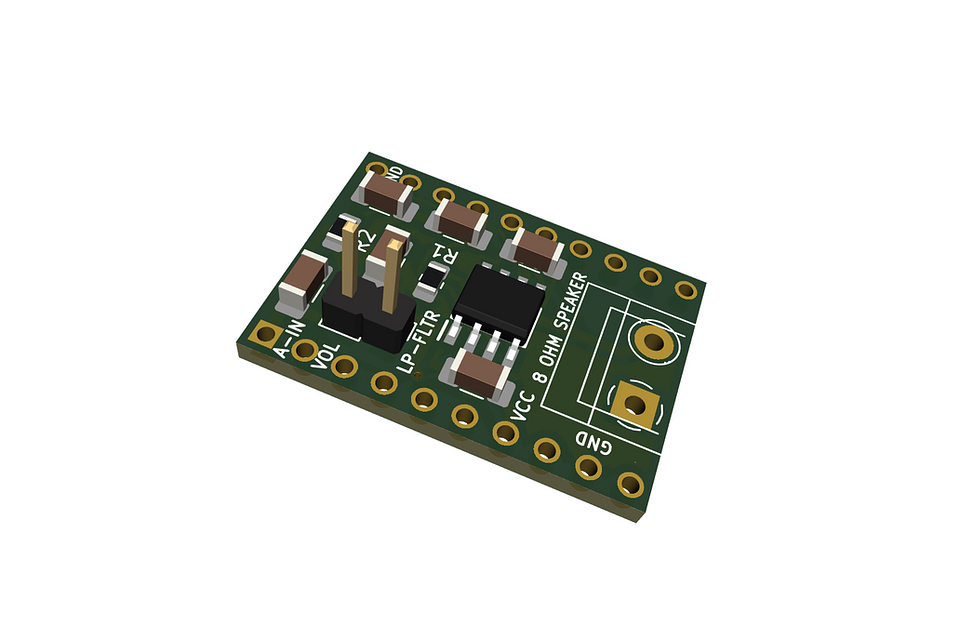
- Built-in optimized speech signal input filter. Bypass (optionally) this filter with jumper J1 on board.
- With the Amplifier shield, there is no risk of wiring it up incorrectly.
- Control speaker volume from microcontroller DAC.
- This device comes fully assembled and tested.
- The onboard LM4875 chip is a class AB analog amplifier (mono) with up to 750 mW output.
- The ESP32 board powers the shield and the LM4875 with 3.3V.
- Only GPIO25 (analog in), GPI26 (volume control), GND, and 3.3V pins connect electrically to the Amplifier shield. The other pins are free to use.
Arduino Talkie Library
Let your robot use your created word or sentences or the pre-defined 1200+ sounds and phrases from the Talkie library. The fun begins when using the Talkie library.
Use my Wav-to-LPC conversion guide (see Documentation below) to avoid common pitfalls when converting your wav-files recordings.
Install the Talkie library with Library Manager in Arduino IDE.
Specification
- Operating voltage: 3.3V externally or via the TinyPICO ESP32.
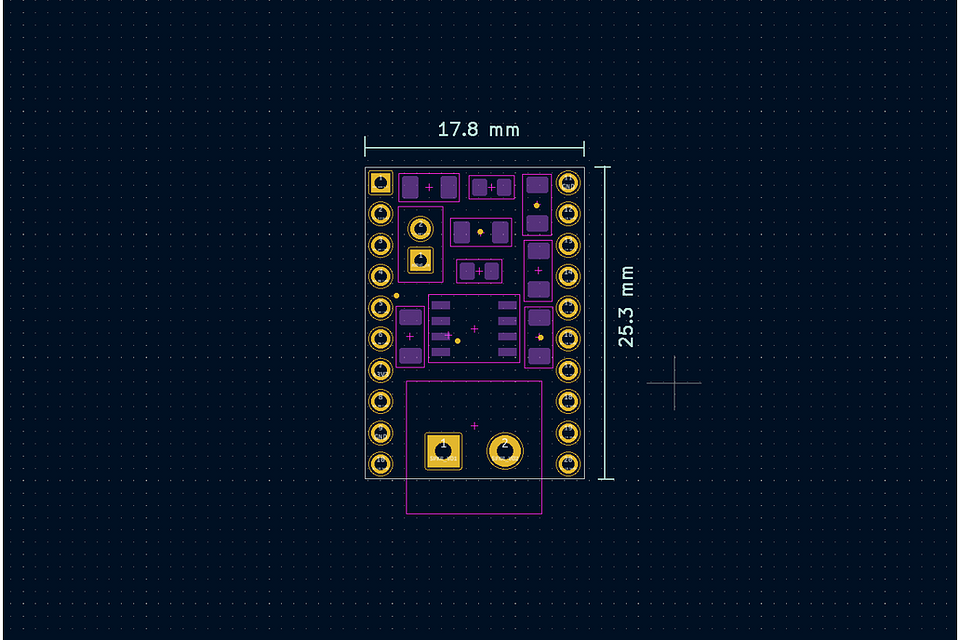
- The shield size is 17.8 x 25.3 mm (0.7" x 1") and fabricated as a two-layer board.
- Board thickness: 1.6 mm (63 mils).
- Formfactor and pinout: Unexpected Maker TinyPICO.
- Weight: 5 grams (0.18 ounce).
- Height: 20 mm (0.79")
Note: The UM TinyPICO ESP32 is not part of the offering.
Links to code and documentation
Shipping policy
We usually ship within 2-3 days after receiving an order.
