This product ships from your country, so you don't
have to worry about import fees or tariffs.

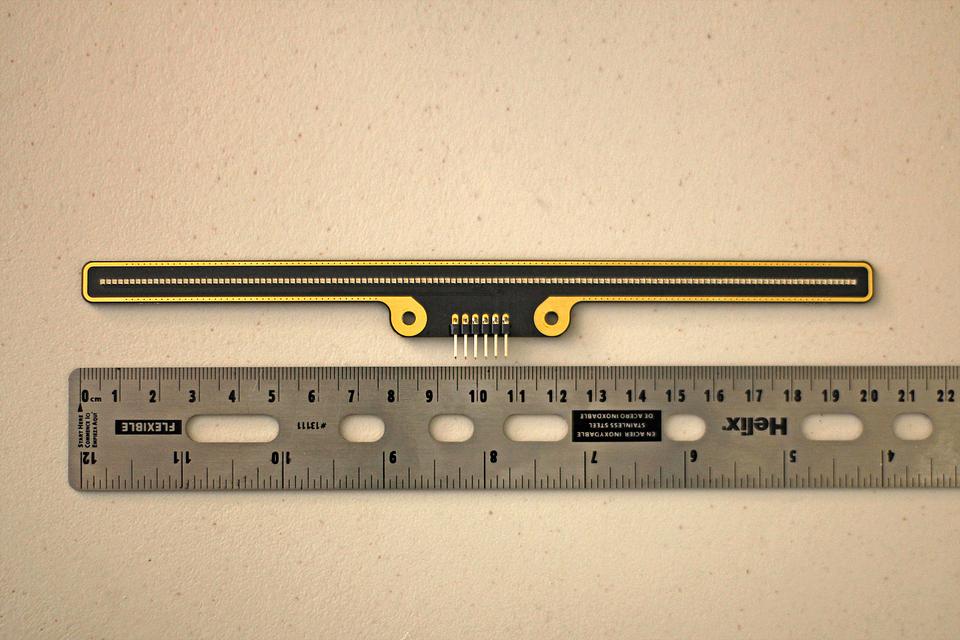
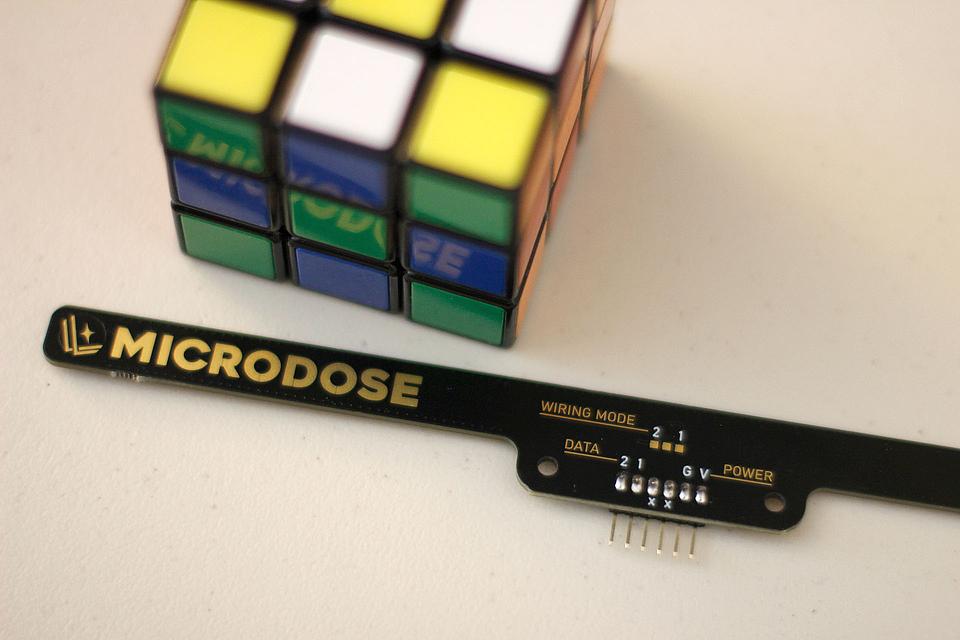
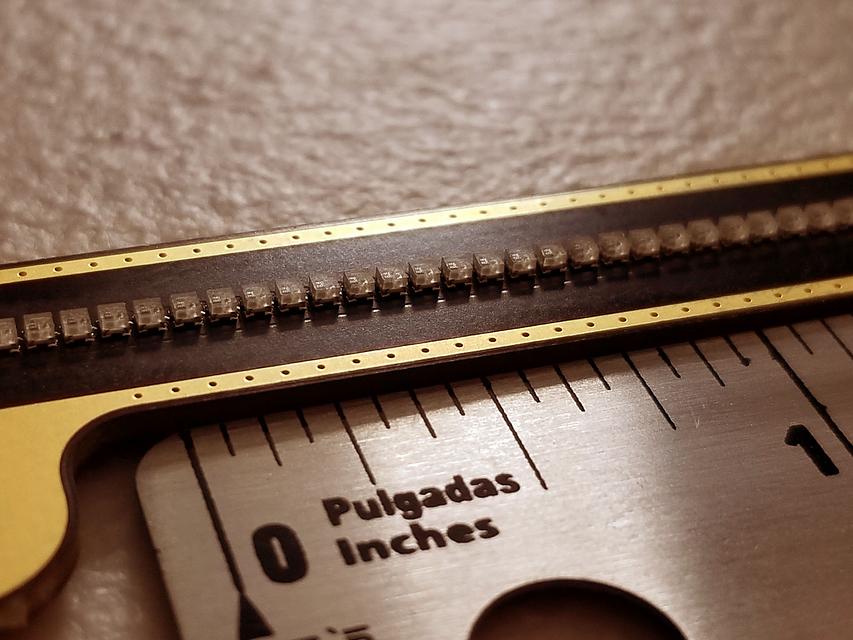


MicroDose is a remarkably tiny 20cm RGB LED strip made with 128 of the world's smallest (1x1mm) addressable LEDs!
MicroDose // 128 Micro-LED Strip
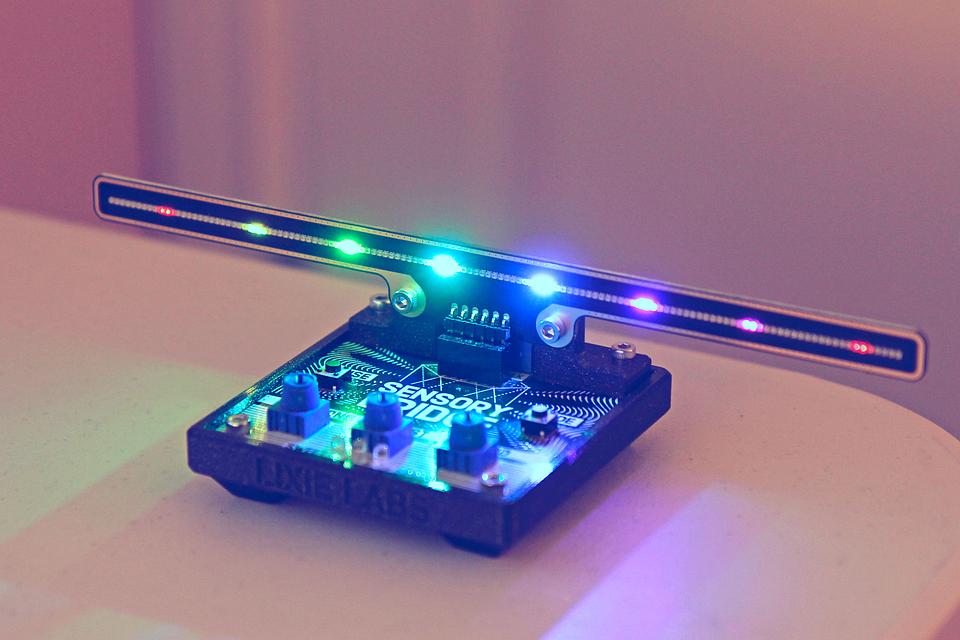
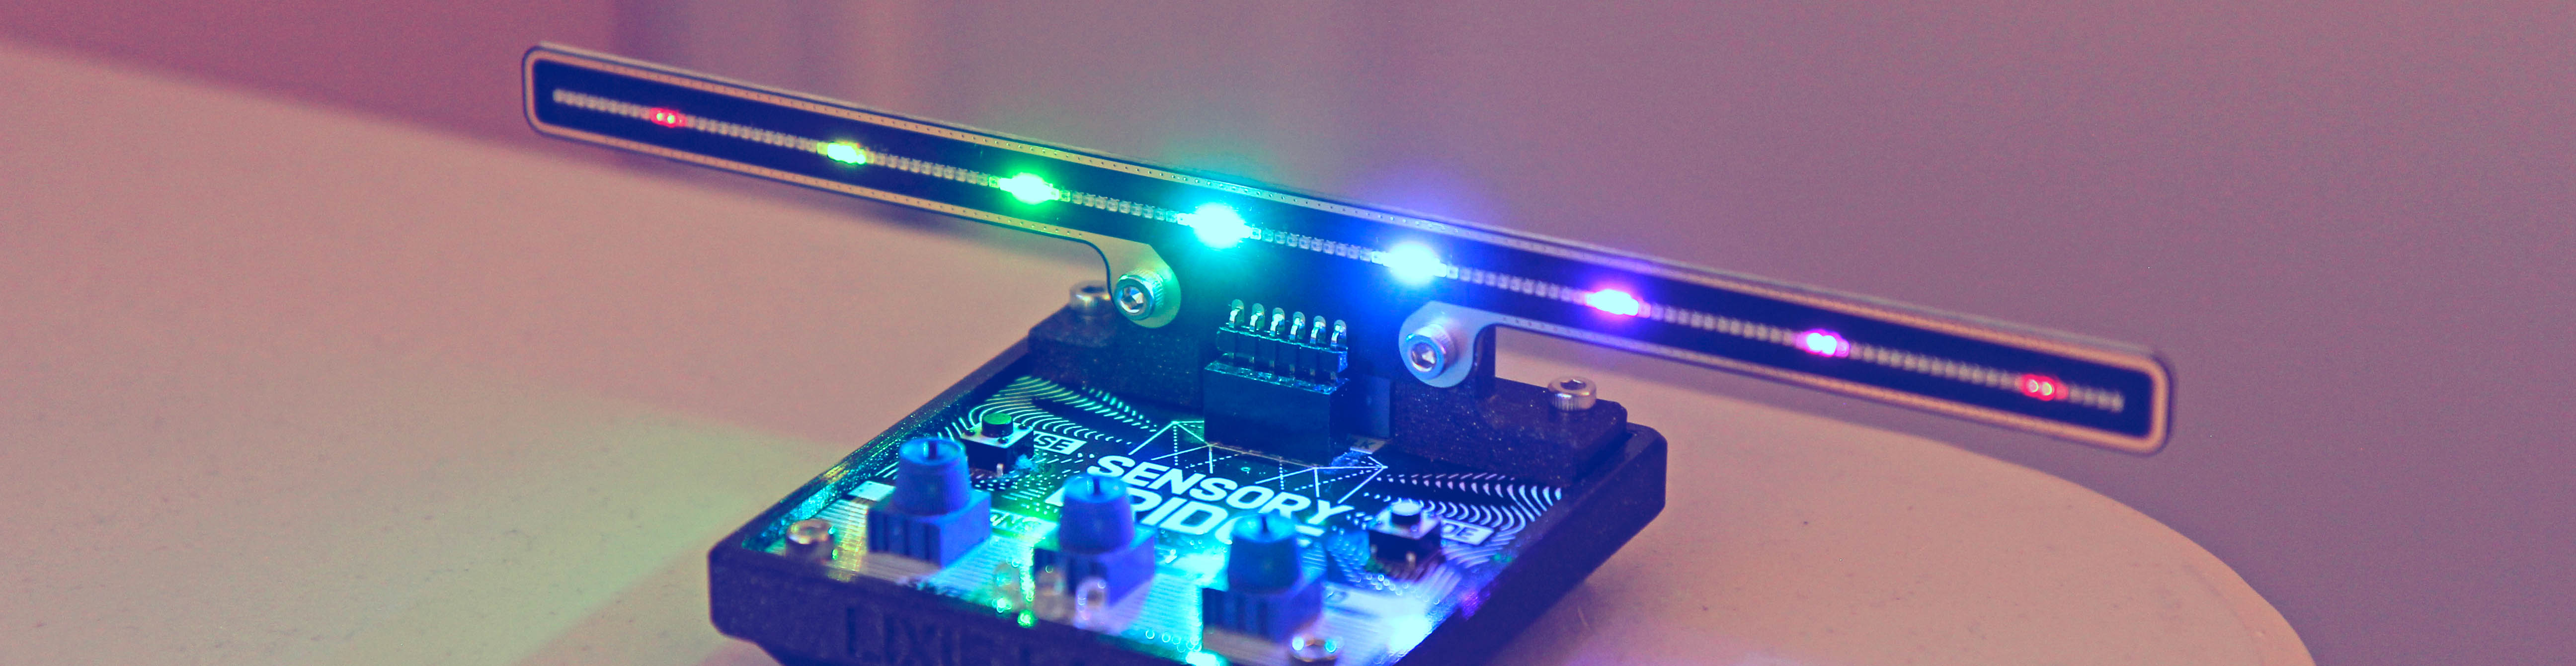
MicroDose is a remarkably tiny 20cm RGB LED strip with world's smallest addressable LEDs! Featuring 128 ultra-bright 1mm RGB LEDs, it makes for a very attractive looking option for displaying your Sensory Bridge output, or for any Arduino/CircuitPython project you can connect it to!
(MicroDose is WS2812B-compatible and can be driven by a single GPIO pin or two pins in parallel to cut down on data transmission times.)
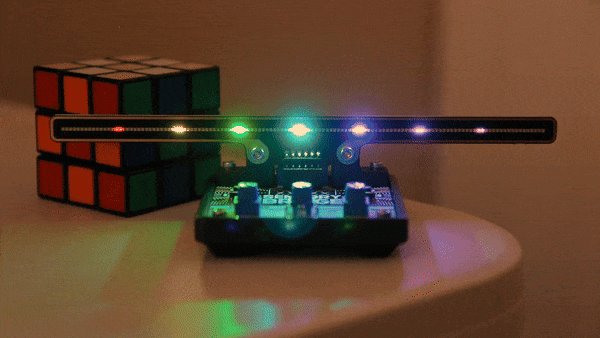
Like the GIF? There's a high-quality 1080p60 version on the official MicroDose webpage!
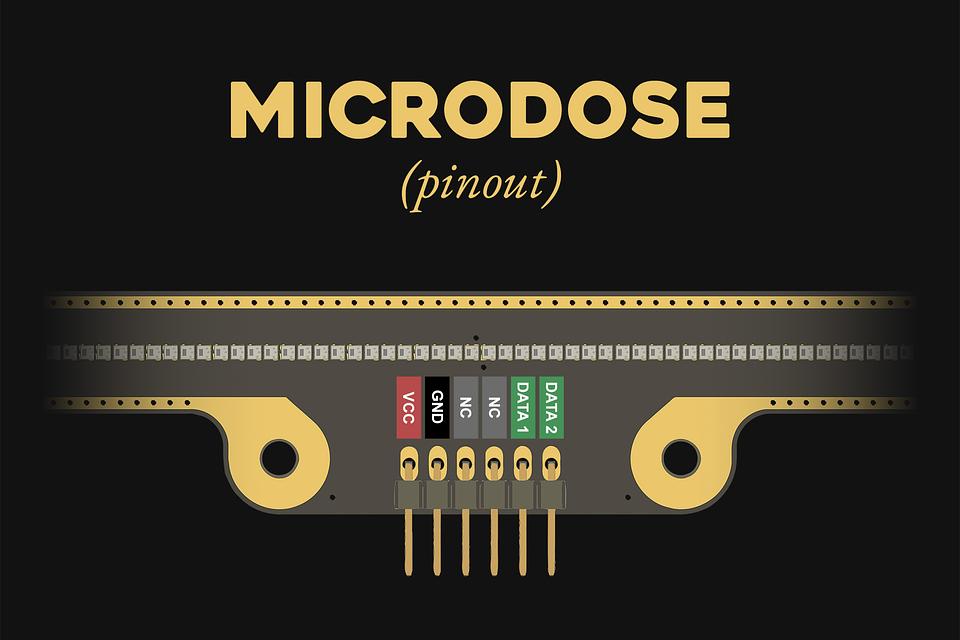
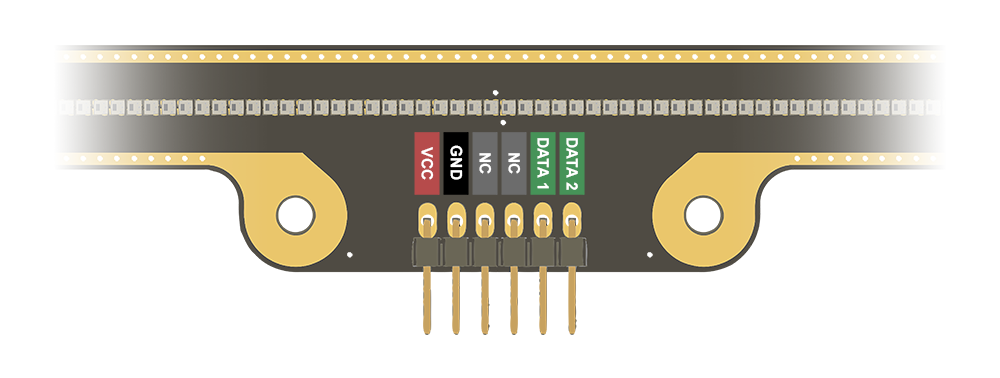
Pinout Diagram
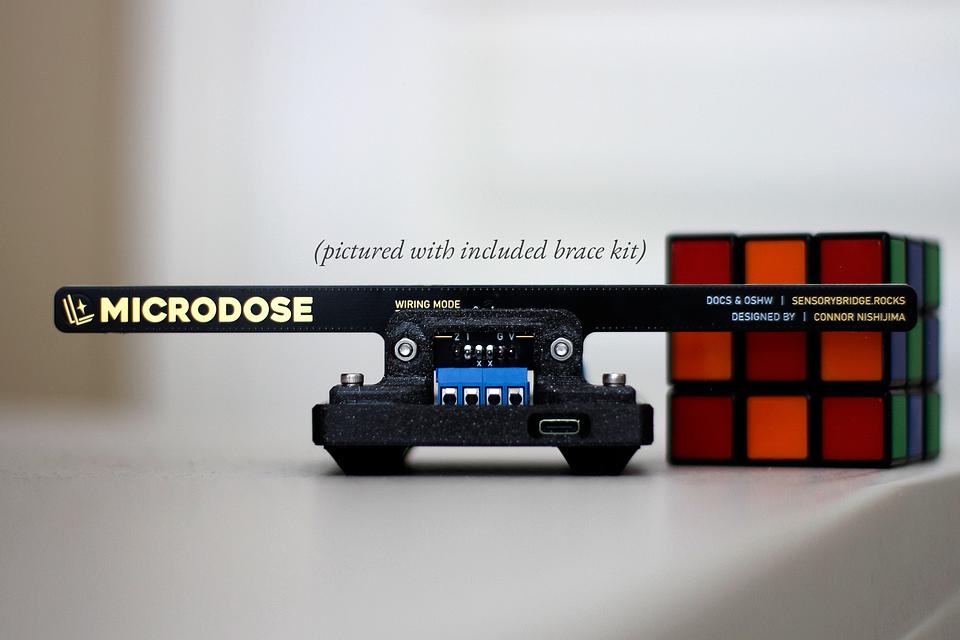
Originally designed as an accessory for Sensory Bridge, MicroDose is also breadboard-compatible for any project you'd like, and has the following pinout:
Sensory Bridge Usage
To use MicroDose with Sensory Bridge, you need to update your Sensory Bridge firmware to at least 4.1.0, and change your LED strip setting from NEOPIXEL to NEOPIXEL X2. Alternatively, you can change the Wiring Mode jumper on the back of the PCB to use Mode 1 (single data pin mode) if you don't want to use the higher refresh rates or update your firmware.
Update/Configure Your Sensory Bridge
Arduino Usage
Besides using MicroDose as an accessory to Sensory Bridge, you can deploy it in any microcontroller project that needs it! By default, MicroDose is configured to use two GPIO to drive each half of the display in parallel to increase the maximum possible framerate.
To use both data lines in parallel for a higher refresh rate, you can use this Arduino Sketch as a template:
#include "FastLED.h"        // Import FastLED library
#define NUM_LEDS    ( 128 ) // MicroDose has 128 LEDs
#define DATA_1_GPIO ( 12 )  // GPIO pin for Data 1 line
#define DATA_2_GPIO ( 13 )  // GPIO pin for Data 2 line

CRGB leds[ NUM_LEDS ];      // Image buffer

void setup() {
  // Initialize both data lanes for each half of the display
  FastLED.addLeds< NEOPIXEL, DATA_1_GPIO >( leds, 0,            NUM_LEDS / 2 );
  FastLED.addLeds< NEOPIXEL, DATA_2_GPIO >( leds, NUM_LEDS / 2, NUM_LEDS / 2 );
}

void loop() {
  for(uint8_t i = 0; i < NUM_LEDS; i++){
    leds[i] = CHSV(i, 255, 64); // Draw a hue gradient
  }

  FastLED.show(); // Send the image
  yield();        // Keep processor happy
}
(If you've reconfigured your MicroDose to run on a single GPIO via the solder jumper on the back, you can use any existing FastLED/NeoPixel/WLED/PixelBlaze code without any special changes.)
CircuitPython Usage
CircuitPython doesn't yet support parallel data lines for WS2812B-compatible LEDs like these, so after physically changing the Wiring Mode to "1" via the solder jumper on the back of MicroDose, you can use this code to demonstrate the display:
import board, neopixel, time

NUM_LEDS    = 128
DATA_1_GPIO = board.D1
leds        = neopixel.NeoPixel(DATA_PIN_1, NUM_LEDS, brightness=0.25, auto_write=True)

while True:
    leds.fill((255, 0, 0)) # Fill red
    time.sleep(1)
    leds.fill((0, 255, 0)) # Fill green
    time.sleep(1)
    leds.fill((0, 0, 255)) # Fill blue
    time.sleep(1)
Changing the Wiring Mode
On the back, there are solder jumper pads for selecting which data mode to use:
| WIRING MODE | EFFECT |
|---|---|
| Mode 1 | All 128 LEDs can be driven using a single GPIO |
| Mode 2 (Default) | Two halves of 64 LEDs each get their own GPIO (faster refresh rate) |
To allow for all LEDs to be driven with a single GPIO, add solder to connect the "1" pad on the back to the center pad, and leave the DATA 2 pin disconnected from your circuit. This change can be reversed at any time!
However, if you want to use Wiring Mode 2 for the dual data rate, MicroDose already has an internal copper short between the "2" pad and the center - which you can cut if you require the DATA 2 pin to be completely disconnected from the LEDs for some reason.
Open Source Hardware
Like all other Lixie Labs products, MicroDose is Open Source Hardware. Want to print your parts in other colors? Make it taller? Add more LEDs? MicroDose is Open Source Hardware under the CERN-OHL-W-2.0 License, and anything you need to know about its internal parts can be found on the OSHW page:
The screw holes for mounting are M3, and are 36mm apart. The LEDs are 1mm² and have a 0.5mm gap between each, for a pixel pitch of P1.5
Links to code and documentation
Documentation (sensorybridge.rocks)
Design Files (sensorybridge.rocks)
Schematics (sensorybridge.rocks)
Shipping policy
As of 6/5/23, Lixie Labs is manufacturing your orders on the fly:
https://twitter.com/lixielabs/status/1665834294026141701
Here are some extras that might be useful for your project!
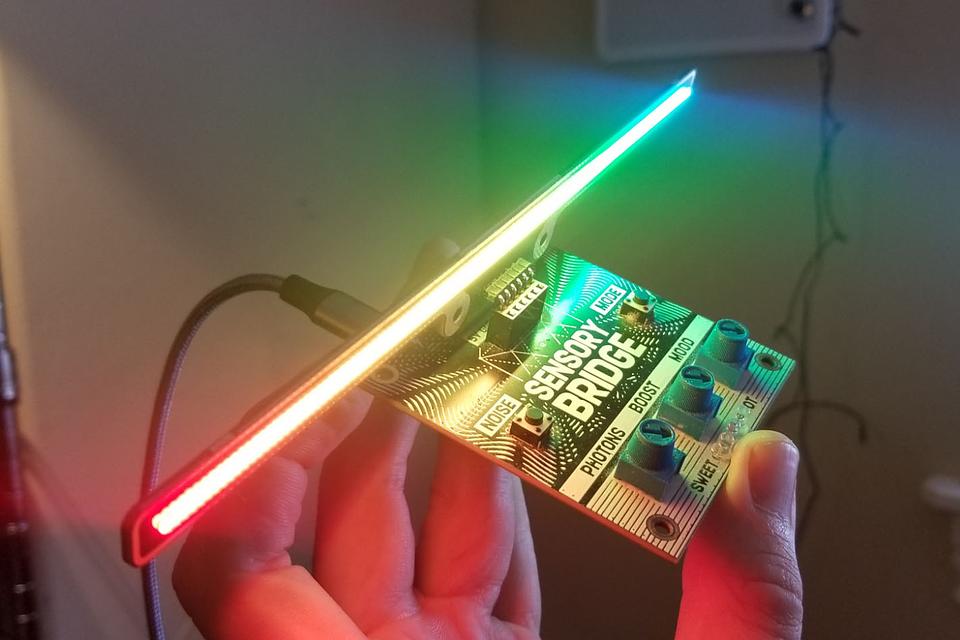
MicroDose can be used as an accessory to Sensory Bridge!
MicroDose / 128 RGB LEDs in the length of a pencil
Sold by Lixie Labs
$50.00
No tax for United States [change]
This item is currently out of stock.
Sign up to get notified when this product is back in stock.The seller
Nearly burnt-out developer of the #PixieChroma and #SensoryBridge!
I'll say it: it's the best LED music visualizer you can buy.
http://sensorybridge.rocks
I'll say it: it's the best LED music visualizer you can buy.
http://sensorybridge.rocks