This product was designed by Digicool Things.
By buying this product you support original hardware creators.


A PS/2 Keyboard and dual Atari Joystick Interface Adapter for your retro CreatiVision TV Console, or your modern CreatiVision re-Creation.
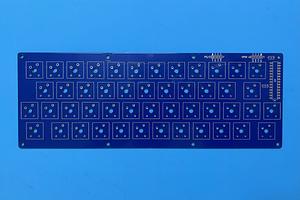
Note: The CreatiVision Controller Interface is supplied in Kitset form (assembly required). The base price is for the double-sided silkscreened CreatiVision Controller Interface PCB ONLY. Optional Packs are available to help complete your CreatiVision Controller Interface Kitset. So if you already have the required components, then you can just order the PCB only.
What is the CreatiVision Controller Interface?
The CreatiVision was a colour TV Gaming Console and Personal Computer from the early 1980's. It was based on the popular 8-bit 6502 CPU, the TMS9929A/28A Video Display Processor, and the SN76489 Digital Complex Sound Generator chip.
As part of my 8-bit retro computing Minimalist Europe Card Bus (MECB) project, I configured some of the MECB Cards to enable re-Creation of the CreatiVision system hardware.
This just left the need for a Controller Interface, to enable connecting a Keyboard and Joysticks to control my CreatiVision re-Creation.
In addition, while completing this project I also finally got my hands on an original CreatiVision Console.
The CreatiVision Console uses a relatively complex interface for it's Controllers. This includes double-pole switches for it's 48-key QWERTY keyboard, making it a relatively non-trivial exercise trying to replace or upgrade a console's existing controllers.
Unfortunately, due to this complex interface, when original controllers wear-out or otherwise stop working, another CreatiVision Console might just end up in landfill. Argh!
In addition, there are also those retro enthusiasts who would like to upgrade their existing CreatiVision Console controllers, to allow using a more modern Keyboard and Joysticks.
So, my CreatiVision Controller interface project turned into a dual purpose design!
It supports upgrading (replacing), the existing controllers on an original CreatiVision Console. As well as providing support for interfacing directly to a PIA on any CreatiVision re-Creation (like my MECB based re-Creation).
For more information about this project, including the MECB based CreatiVision re-Creation, my design journey creating this CreatiVision Controller interface, and a demonstration of it's use on both an original CreatiVision Console and my MECB CreatiVision re-Creation, be sure to watch my CreatiVision re-Creation series of Videos.
What You Get
To satisfy everyone's needs, I've split the CreatiVision Controller Interface Kitset into Optional add-on Packs.
Firstly, note that the base price is for the double-sided silkscreened CreatiVision Controller Interface PCB Only.
Then you add Optional Packs to complete your Kitset, depending on your parts requirements.
Optional Hardware / Connector Pack includes:
- 4x 12mm Nylon PCB Spacer
- 8x 6mm Nylon Bolt (for Spacer mounting)
- 1x 24-pin IDC Male Socket PCB Right-Angle Mount (PIA)
- 2x 9-pin DB9 Male Socket PCB Right-Angle Mount (Joysticks)
- 1x 6-pin Mini-DIN Female Socket PCB Right-Angle Mount (Keyboard)
- 1x 2-pin Screw Terminal 2.54mm pitch (Console powered)
- 1x 40-pin PCB Header Strips (for 2x 10 and 4 pin Headers)
- 1x 4-pin PCB Header Right-Angle (for UPDI Programming Header)
Optional Programmed AVR32EA28 + SDIP28 IC Socket Pack includes:
- 1x AVR32EA28 Microcontroller (U2) pre-programmed with the CreatiVision Controller Interface v2 code
- 1x SDIP28 round-pin IC Socket (for U2)
Optional Tested MT8816AP + PLCC44 IC Socket Pack includes:
- 1x Pre-tested MT8816AP Analog Switch Array in PLCC44 (U1)
- 1x PLCC44 Through-Hole IC Socket (for U1)
Optional Component Pack includes:
- 16x 1N4148 Small Signal Diodes (D1 - D16)
- 2x LSM115F Ultra Low Vf Schottky Diodes (D17, D18)
- 1x 78M05 TO-252 package Regulator 5V/500ma (U3)
- 4x 0.1µf Capacitor 5mm Mount (C1 - C4)
- 1x 0.33µf Capacitor 5mm Mount (C5)
- 1x 3K3 SIP9 Resistor Network (RN1)
- 2x 75ohm 1/8w Carbon Film Resistors (R1, R2)
Optional IDC 20cm Ribbon Data Cable Pack includes:
- 24 pin IDC Connector Ribbon Data Cable (as seen in Video and my re-Creation testing photo) - Approximately 20cm long. Only required for connection to a CreatiVision re-Creation (e.g. MECB Motorola I/O Card PIA connector).
CreatiVision Controller Interface BOM
The following is a full Bill Of Materials (BOM) to allow fully assembling your CreatiVision Controller Interface (see also the BOM photo image).
Note that the PCB is supplied, and all components required are available in the Optional Packs.
Some components are of course optional. For example DIL IC Socket, although I do highly recommend IC Sockets are used throughout. Also, the # indicated components are only required for Direct PIA (re-Creation) use, and the ## indicated components are only required for Original Console use.
I have also included an indication of where I sourced my parts from, if this is of assistance.
| Item | Qty | Source | Part Number |
|---|---|---|---|
| CreatiVision Controller PCB | 1 | JLCPCB | |
| 12mm Nylon PCB Spacer | 4 | AliExpress | |
| 6mm Nylon Bolt | 8 | AliExpress | |
| 24 pin IDC Male Socket PCB RA Mount # | 1 | Mouser | |
| 9 pin DB9 Male Socket PCB RA Mount | 2 | Mouser | |
| 6 pin Mini-DIN Female Socket PCB RA Mount | 1 | Mouser | |
| 2 pin Screw Terminal 2.54mm pitch ## | 1 | AliExpress | |
| 10-pin PCB Header ## | 2 | AliExpress | |
| 4-pin PCB Header | 1 | AliExpress | |
| 4-pin Right-Angle PCB Header | 1 | AliExpress | |
| MT8816AP Analog Switch Array PLCC44 (U1) | 1 | Mouser | MT8816AP |
| AVR32EA28 8-bit AVR MCU (U2) | 1 | Mouser | AVR32EA28 |
| 1N4148 Small Signal Diode (D1 - D16) # | 16 | Mouser | 1N4148 |
| LSM115F Schottky Diode (D17,D18) | 2 | Mouser | LSM115JE3/TR13 |
| 78M05 TO-252 Regulator 5V/500ma (U3) ## | 1 | Mouser | MAX708CPA |
| 0.1µf Capacitor 5mm (C1) ## | 1 | AliExpress / Mouser | |
| 0.1µf Capacitor 5mm (C2 - C4) | 3 | AliExpress / Mouser | |
| 0.33µf Capacitor 5mm (C5) ## | 1 | AliExpress / Mouser | |
| Resistor Network 3K3 SIP9 (RN1) # | 1 | Mouser | 4609X-101-332LF |
| 75ohm 1/8w Carbon Film Resistors (R1, R2) | 2 | Mouser | OJ7505E-R52 |
| PLCC44 TH IC Socket (for U1) | 1 | AliExpress | |
| SDIP28 IC Socket (for U2) | 1 | AliExpress | |
| IDC Terminated 24 way Ribbon Data Cable # | 1 |
- # - Only required for Direct PIA (re-creation) use
- ## - Only required for Original Console use
Your CreatiVision Controller Interface Kitset order is shipped in a robust cardboard carton with packing, for safe delivery via New Zealand International Air Parcel (see example shipping photo).
Note: Visit the Documentation link (below) for more information on my MECB based CreatiVision re-Creation project, and other projects that might be of interest to you.
The Video linked below is Part 2 of my video series covering the CreatiVision re-Creation project. This Part 2 Video (and Blog post) covers the original v1.2 CreatiVision Controller interface design journey, kitset assembly, and demonstration of the Controller interface in use with both an original CreatiVision Console and the MECB CreatiVision re-Creation.
A subsequent Part 3 Video (and Blog post) covers the updates to the current V2.0 CreatiVision Controller (as is offered here).
A final Part 4 Video (and Blog post) covers a Mechanical Keyboard add-on (listed separately).
The original Part 1 Video is also available on my YouTube channel.
Links to code and documentation
Documentation (digicoolthings.com)
Shipping policy
We pride ourselves with our "Next Business Day" Shipping Policy, and robust carton packaging. We also build to order, so if you order items with an "Assemble it for me" option selected, it may slightly delay shipping (while we build it for you).
Here are some extras that might be useful for your project!
CreatiVision Controller Interface
Sold by Digicool Things
$4.90
No tax for United States [change]
Stock available: 5
The seller

At Digicool Things we are passionate about Cool Things created with Digital Technology. Hence, Digicool Things!