
In 9 carts
Lotus 58 Glow
Sold by Tweety's Wild Thinking
$12.00
No tax for United States [change]
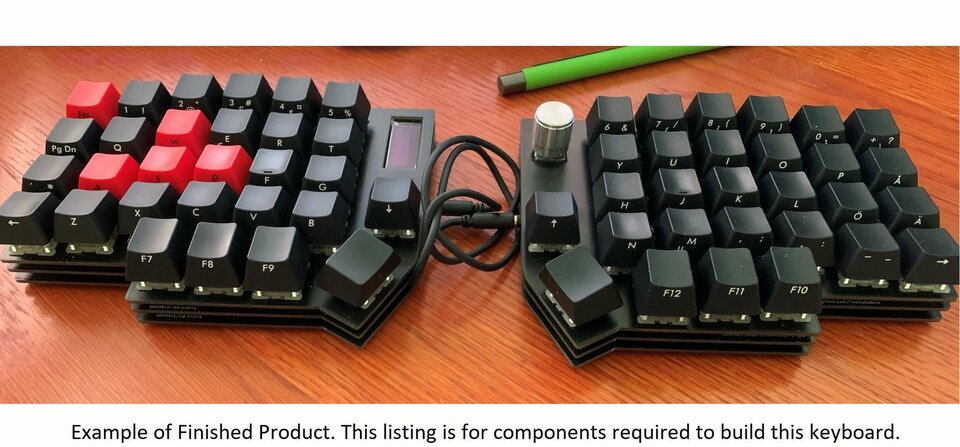
Build your own ergonomic keyboard!
Lotus 58 Glow is a fully programmable split keyboard that can be tented/tilted/oriented to suit your needs.
Main Features:
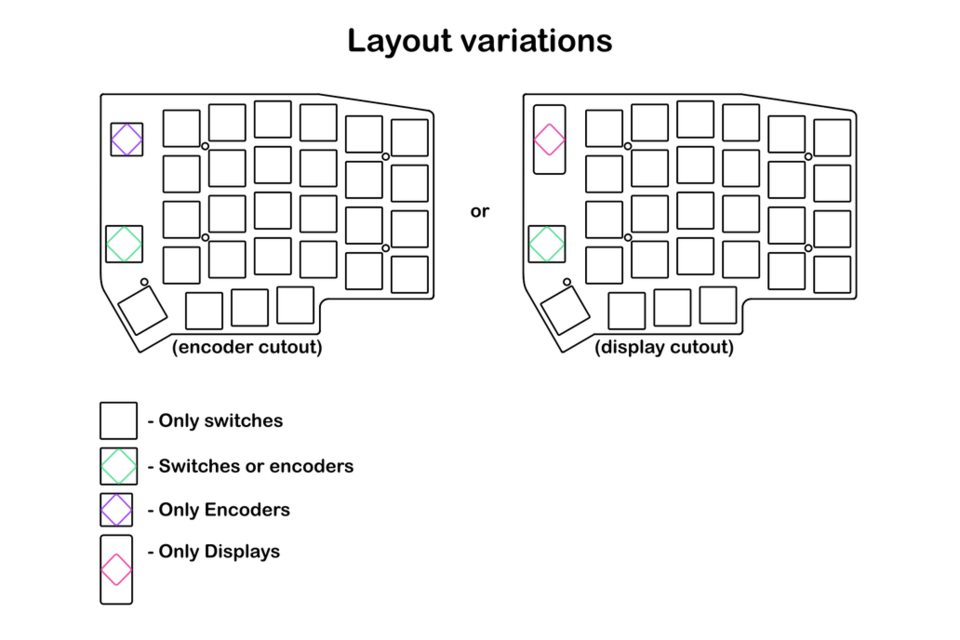
- Lotus features 58 keys, with a 4x6 main matrix and 4+1 thumb-keys per hand (56 normal keys with encoders on lower position).
- Lotus supports one Rotary encoder and one OLED per hand.
- Designed with a Sandwich-style plate/case as part of the design and with 3D printed cases as added options.
- Lotus can easily be used as a 'normal' split keyboard for typing and work, or with either hand separate as a dedicated gamepad/Gaming keyboard.
- Lotus is fully QMK and VIAL compatible, with every aspect of it being programmable.
- Kaihl Hot-swap sockets for Cherry MX compatible switches.*
- Hands are connected using serial link (TRRS or USB type C) with support for ESD protection.**
Build Features:
- Main components are either through-hole or large and easily soldered SMD (RGB & Hotswap Sockets) suitable for beginners (Some smaller SMD components are needed for the USB type C version).
- Each hand uses an Pro Micro Arduino clone as the controller (Pro Micro or pin equivalent).
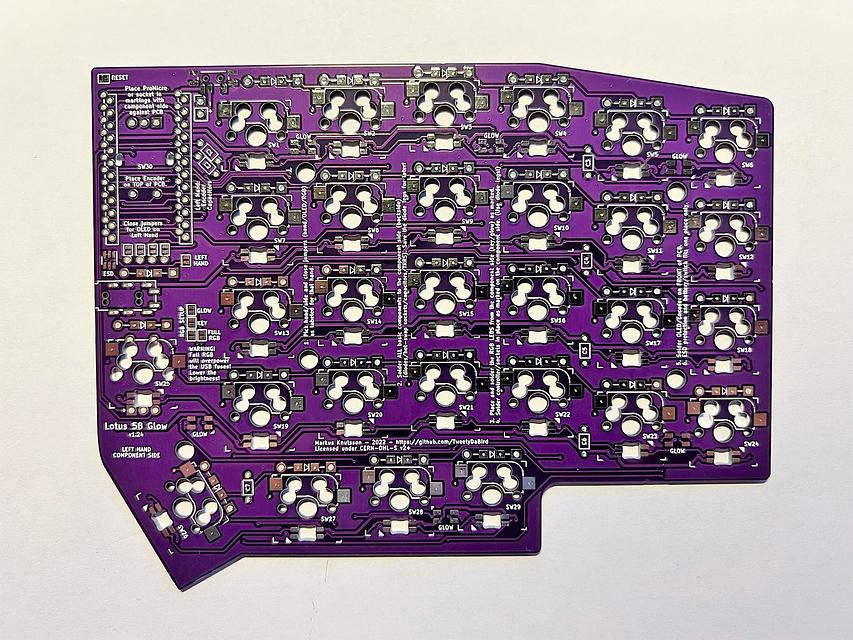
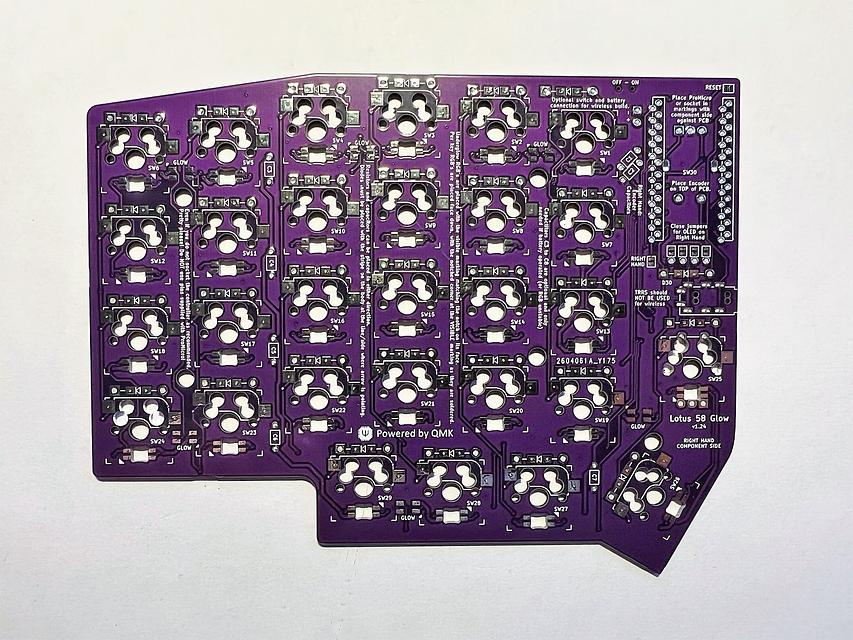
- The PCB design is reversible, making the PCB for both hands identical for lower cost.
- Full build instructions are printed on the PCB for an easy build.
Optional Features (Requiring additional parts):
- Optional OLED Screen (one per hand).
- Optional Rotary Encoder (one per hand).
- Optional RGB Glow (6 pcs) - Suitable as background lighting, and can be used as a layer indicator or similar.
- Optional Per key RGB (29 pcs) - Multiple effects supported in QMK & Vial.
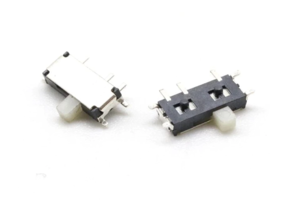
- Optional Slide switch to switch between Glow or Key RGB as currently active.***
Physical dimensions (LxB): 145x115 mm Case height 11-13mm, Height with caps/encoder ~35mm
'* Please note that Lotus supports only Cherry MX type switches (3 & 5 pin), NOT Kaihl Choc, as they require a different PCB design.
** The ESD protection is optional/extra on the TRRS version, but neccesary and included on the USB type C version.
*** Having both Glow and Key RGB active at the same time can easily overpower the controller/USB ports ability to deliver power if a too high brightness is set. Without the switch, a soldered jumper selects the type of RGB used.
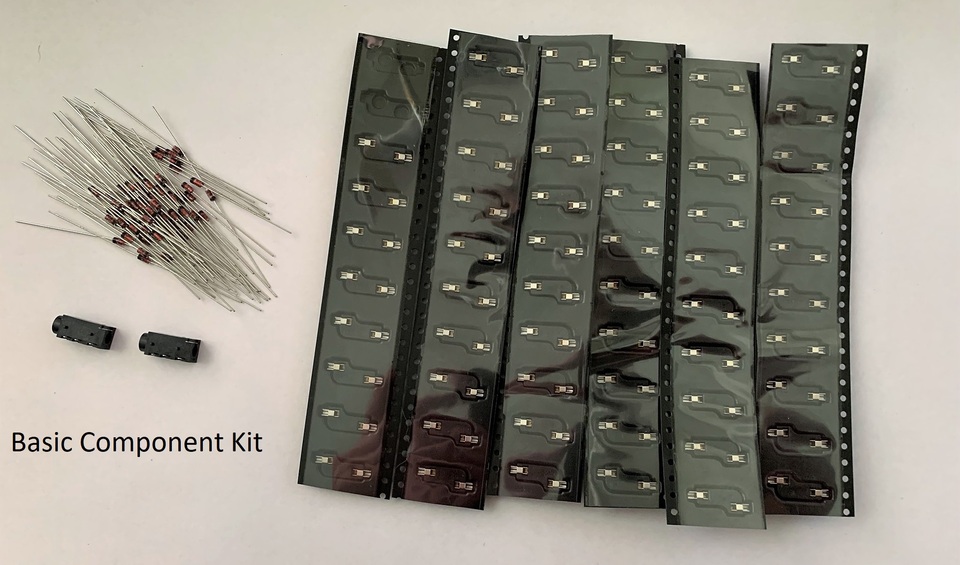
Basic Component Kit
These add-on kits contain all the basic components needed to make a complete and working keyboard for your PCB version.
| Part | TRRS link | USB type C link |
|---|---|---|
| Hot-Swap Sockets | 29 pcs Kailh (Cherry MX) | 29 pcs Kailh (Cherry MX) |
| Diodes | 30 pcs 1N4148 (DO-35) | 30 pcs 1N4148W (SOD-123F) |
| Link Cnnector | 1 pcs TRRS female connector | 1 pcs USB type C connector |
| ESD Protection | (Optional) 1 pcs SRV05-4 | 1 pcs SRV05-4, 2 pcs Ferrite Beads |
| Reset Switch | 1 pcs | 1 pcs |
Two main versions
Lotus 58 Glow comes in two main version, both with the same layout options and main features.
| Feature | TRRS link | USB type C link |
|---|---|---|
| Hot-plug connections | NOT SUPPORTED! (See below) | Full support |
| Support for Wireless Builds | Battery Connection/Switch | No support |
| Beginner friendly soldering | SMD optional (ESD) | Limited SMD required (USB/ESD) |
| Select active RGB (Glow / Per-Key) | External switch | External switch |
| Easily accessible reset switch | Supported | Supported |
| Universal Case-plates | Supported | Supported |
| 3D-printed case | Dedicated version | Dedicated version |
| Current version (Change Log) | v1.29 | v1.41 |
TRRS link
Uses the classic TRRS link, with optional protection for unintended hotplugging.
The classic, more beginner friendly variant can be built (almost) entirely out of through hole (TH) type components. These are larger and more robust, making them easy for a novice builder with limited experience soldering. Even the RGB LED's are selected to be as easy as possible to solder for a beginner.
This variant features support for an optional ESD protection circuit (a tiny SMD component) that should protect the controller from damage should you accidentally unplug or plug in the TRRS cable while the keyboard is powered. This does however NOT mean that it in any way supports intentional and/or repeated hot-plugging of the TRRS cable! Doing so will ultimately result in damage sooner or later.
USB type C link
USB type C link, allowing hot-plugging.
The more modern USB type C link offers care-free hot-plugging, you can simply unplug or plug the two hands together without risking any damage with the keyboard fully powered from the computer USB cable. The small downside is that the components needed are of SMD type, meaning it is slightly less beginner friendly to solder.
The USB type C port is designed into the keyboard to be as fool-proof as possible, and if you by accident plug it into a host port (computer or USB hub), it simply means nothing happens! No device is detected, and no power is applied.* To link the two hands you need a standard USB type C to type C cable.
'* Connecting powered hubs with questionable standards adherence, keyboards and possibly multiple computers together in entriely non-standard ways can still cause power loops, and damage to components, user beware!
What do you need to buy?
You can buy most parts for a full functioning keyboard in this listing or as additional components in this store. You will however need to add switches, key-caps and colored/sleeved cables of your choice from other sources, as it would be impossible for me to stock a reasonable selection of what the market can offer.
For a bare minimum functional keyboard (two hands) you will need:
- This PCB (x2) with the component kit of your choice (a kit is needed, the choice is based on your soldering skill)
- Controller (x2) Pro Micro or a more powerful equivalent Pro Micro RP2040.
- Case Kit (x2) with hardware or a set of 3D printed cases or similar.
- Controller Sockets (x2) Technically optional, but highly recommended!
If you prefer to have your keyboard pre-built, you can add the Build Fee (x2) to your order.
Required Accessories
- Key Switches, Cherry MX compatible (29 pcs / PCB, 58 pcs total)
- Key Caps, Cherry MX compatible (Set)
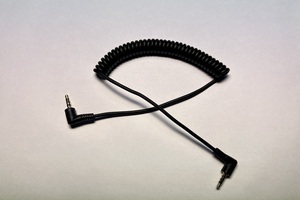
- Cable linking the two hands (TRRS or USB type C)
- USB cable to your computer (Connector types depend on the controller and computer port)
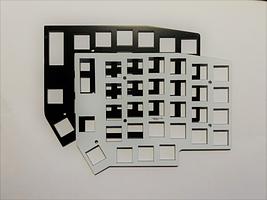
The Sandwich Case
Lotus 58 Glow is designed as a complete keyboard with a sandwich style case of the same FR4 fibreglass material as the PCB.
The FR4 fibreglass plates used are quite stiff and give a good intermediate feel for keyboards, making it the ideal low cost material for a case. The 'case plates' are available in black or white, with multiple options based on your choice of layout.
Please Note! You do infact need a case of some kind, as being hot-swap compatible the front plate helps hold the switches in place, and without the plate, they will very easily come undone. You can however 3D print your own case, or have plates made in whatever material you desire. All the information required for this can be found on the GitHub page.
Build Guide & Firmware
Required Tools
While better (and possibly more) tools often make the build experience easier and more enjoyable, this article lists the most basic tools that you actually will need.
A Beginner's Guide to Soldering Equipment
Build Guide
The PCB has most of the needed build instructions printed on the silkscreen, and you can likely build the entire keyboard from these! If you however need more detailed instructions, please refer to the GitHub link to Documentation below.
If ever the instructions in the build guide and the instructions on the silkscreen are different, the version on your actual PCB is what are in fact relevant for your version!
Firmware
QMK
Using basic QMK for your keyboard is the most versatile and powerful option, but requires a bit more effort and/or knowledge to make more advanced options work.
Lotus 58 is part of QMK's main fork and the firmware can be built from there, following QMK's guides.
The most recent iteration of this firmware is available for use a template/starting point here.
VIAL
VIAL, a fork of QMK allowing interactive key-remapping without flashing a new firmware is the more beginner friendly option and a great starting point.
The GitHub repository for the firmware, is available here, and can be customized to your own preference.
Links to code and documentation
Shipping policy
Normal handling time is 3 - 5 working days, not including build items (Those usually take 1 - 2 weeks).
Shipping is done with insured/signed for parcels, where no such service is available the parcel is sent as insured parcel, but may not be fully traceable the entire transit. If no insured or traceable service is available, parcels will be sent as uninsured/untraceable at the buyers responsibility. All of which is clearly stated on checkout.
All packets are represented to courier services and customs at their true sale value, and all responsibility for import fees, taxes and tariffs lie with the buyer.
The SE/EU "Act on Distance Contracts and Off-Premises Contracts (SFS 2005:59)" allows returns of the items in undamaged (unsoldered!) condition within 14 days of receiving it. Return shipping on returned items are the responsibility of the buyer.
.JPEG)
.JPEG)
.JPEG)
.JPEG)
.png)
The seller

All items are continually restocked, and if nothing else is noted, should restock in 7-10 working days.
Custom design requests welcome.